Además de configuraciones predefinidas de tela, usted puede crear sus propias configuraciones de tela personalizada para satisfacer necesidades particulares. Puede también modificar, renombrar y eliminar telas personalizadas.
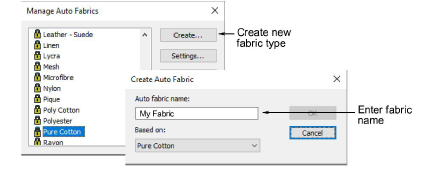
1Seleccione Configuración > Administrar telas automáticas.
Si ya tiene telas personalizadas definidas, tiene la opción de editarlos, cambiarlos de nombre o eliminarlos.
2Para crear una nueva clase de tela, haga clic en Crear.
3Introduzca el nombre de la nueva tela Si quiere basar su tela nueva en las configuraciones predeterminadas, seleccione vacío.
4Haga clic en Aceptar.
Se abre el diálogo Configuraciones de la tela automática. Este diálogo le permite establecer los valores de tela para cuatro grupos de objeto – Tatami/División de programa, Satín ancho, Satín estrecho y Letras – además de introducir detalles de estabilizadores recomendados.
1Haga clic en la pestaña para acceder a las configuraciones de Relleno tatami/división programada. Estas se volverán las predeterminadas para los objetos tatami y división programada.
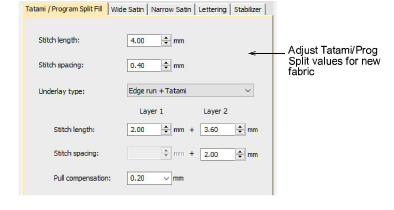
2Ajuste las configuraciones Longitud y Espaciado para objetos de relleno Tatami/División de programa tal como lo requiera:
3La puntada Tatami consiste en filas de puntadas de corrido y es adecuada para rellenar formas grandes, irregulares. Vea Puntada tatami para más información.
3División de programa es una clase de puntada decorativa. Úsela para llenar áreas amplias y grandes con efectos artísticos al tiempo que mantiene el aspecto de campo sólido de puntadas. Vea Crear texturas con divisiónes de programa para más información.
3Establezca una clase de refuerzo adecuado para objetos de Tatami/División de programa. Vea Estabilizando con refuerzos para más información.
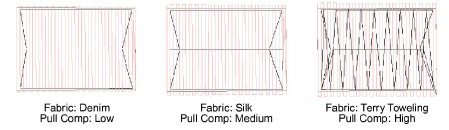
4Establezca una cantidad de compensación de tire para estos objetos. Vea Compensación de halado para más información.
1Haga clic en la pestaña para acceder a las configuraciones Satín ancho. Estas configuraciones se convertirán en las predeterminadas para objetos más grandes de Satín.
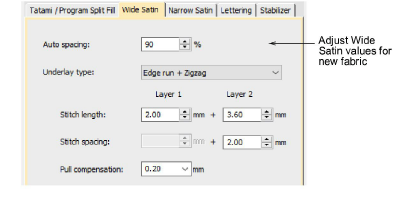
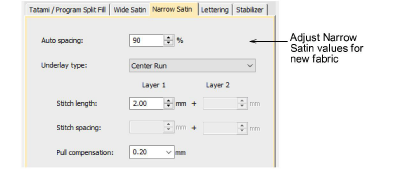
2Ajuste las configuraciones de Satín ancho tal como lo hizo para objetos de relleno Tatami / División de programa. Vea Relleno de satín para más información.
En lugar de las configuraciones Longitud de puntada y Espaciado de puntada, tiene una configuración individual de densidad que está controlada por una barra de dispositivo deslizante.
3Haga clic en la pestaña para acceder a las configuraciones de Satín estrecho y ajuste como lo hizo para objetos de Satín ancho. En general, los objetos pequeños requerirán un tipo de relleno distinto. Vea Relleno de satín para más información.
1Haga clic en la pestaña para acceder a las configuraciones de Letras.
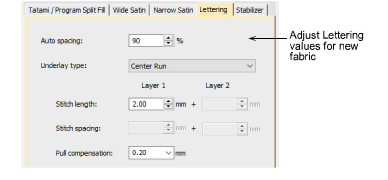
2Ajuste las configuraciones tal como lo hizo para objetos de Satín. Vea Aplicar tipos de puntada y efectos a las letras para más información.
1Haga clic en la pestaña para acceder a las configuraciones Estabilizador.
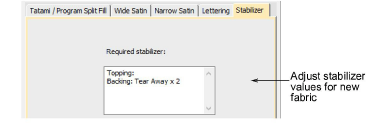
2Digite uno o más estabilizadores recomendados junto con una descripción u otra información relevante de la tela personalizada. Esta información se mostrará en el diálogo Tela automática. Vea Cambiar telas para más información.
Productos
Complementos de EmbroideryStudio
Soluciones
Aprendiendo
|
Copyright ©2025 Wilcom Pty Ltd | Condiciones de uso | Política de privacidad |