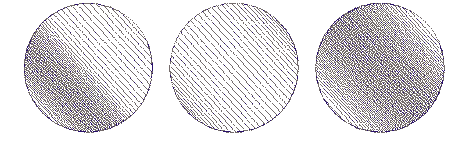
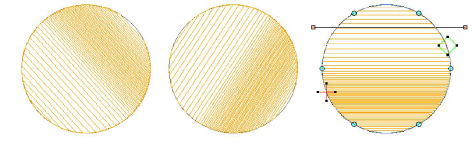
La característica Espaciado acordeón varía el espaciado de puntada entre relleno denso y abierto, produciendo efectos de gradiente y matizado difíciles de producir manualmente. Proporciona una manera sencilla de producir variación en un patrón de relleno y la ilusión de profundidad. Se utiliza mejor con relleno tatami. Al usarlo, se ignoran las configuraciones actuales de espaciado – incluidos Espaciado automático y Espaciado fraccional. Sin embargo, otras configuraciones todavía aplican, incluyendo el ángulo de puntada.
1Haga clic en el icono Espaciado acordeón. El efecto se aplica a objetos nuevos o seleccionados, en base a las configuraciones actuales de Espaciado acordeón.
Idea: A causa de la puntada abierta, es mejor usar Espaciado acordeón sin Refuerzo automático.
2Haga clic derecho en el icono Espaciado acordeón para acceder a las propiedades del objeto.
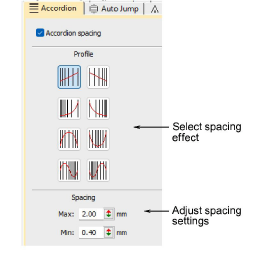
3En el panel Perfil, seleccione un efecto de espaciado.
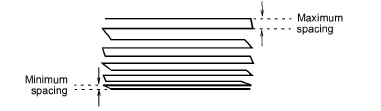
4En el panel Espaciado, ajuste los valores de espaciado:
3Use la herramienta Reformar para ajustar el ángulo del relleno gradiente.
3Apliqué efecto Trapunto para forzar los corridos de desplazamiento de refuerzo hasta los bordes de un objeto para que no puedan verse a través del bordado abierto. También es buena idea desactivar Refuerzo automático.
Productos
Complementos de EmbroideryStudio
Soluciones
Aprendiendo
|
Copyright ©2025 Wilcom Pty Ltd | Condiciones de uso | Política de privacidad |

