Usted selecciona motivos para usar en corridos, rellenos o individualmente, mediante el panel Propiedades del objeto.
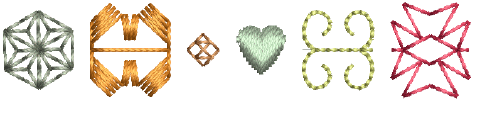
Los motivos se usan generalmente en contornos decorativos o rellenos abiertos. Sin embargo, puede añadir motivos al diseño uno a uno. Gire, gradúe o refleje motivos conforme los añade o edítelos como cualquier otro objeto.
1Haga clic derecho en el icono Corrido de motivos para acceder a las propiedades del objeto.
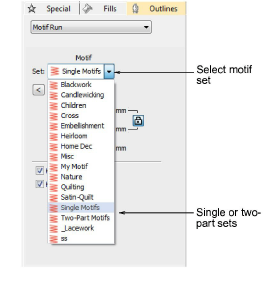
2Seleccione un grupo de motivos de la lista. Hay dos conjuntos específicos de los motivos – de una o de dos partes. Sin embargo, puede usar cualquier otro conjunto disponible.
3Seleccionar un patrón desde la lista desplegable. Alternativamente, haga clic en el botón de la flecha para acceder a la biblioteca de motivos.

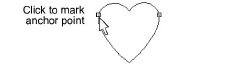
4Seleccione Usar motivo. Aparece un contorno de motivo pegado al puntero del ratón.
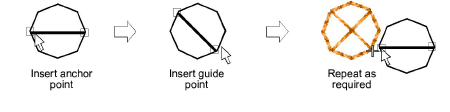
5Haga clic para marcar el punto de ancla.
6Arrastre el ratón para rotar, escalar o reflejar.
3Para rotar, mueva el puntero y haga clic de nuevo.

3Para reflejar el motivo, haga clic con el botón derecho.

3Para escalar el motivo, pulse Mayús, mueva el puntero y haga clic de nuevo.
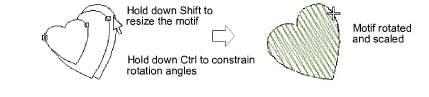
7Repita como requiera. Las puntadas se generan automáticamente.
8Alternativamente, pulse Intro para aceptar la posición y configuraciones predeterminadas.
9Pulse Esc para terminar.
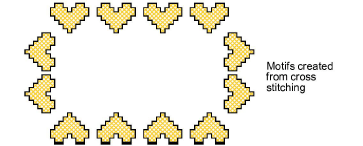
Idea: Puede crear motivos a partir de patrones hechos en ES Punto de Cruz y usarlos para crear un muestrario de punto de cruz. Vea Suplemento de punto de cruz para mayores detalles.
Productos
Complementos de EmbroideryStudio
Soluciones
Aprendiendo
|
Copyright ©2025 Wilcom Pty Ltd | Condiciones de uso | Política de privacidad |


