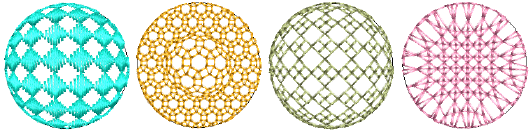
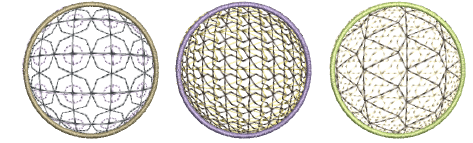
El uso de Globo dentro con Pandeo 3D crea un efecto cóncavo aumentando el tamaño del motivo y el espaciado alrededor de un punto central. Globo fuera proporciona un efecto convexo al disminuir el tamaño del motivo y el espaciado. Puede aplicar el efecto a un objeto completo o una parte específica del relleno.
1Seleccione un objeto de relleno de motivos y haga clic en el icono Pandeo 3D. Se abre el panel Propiedades del objeto > Curva.
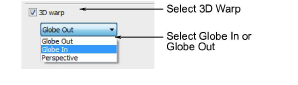
2Seleccione la casilla Pandeo 3D y seleccione Globo dentro o Globo fuera de la lista.
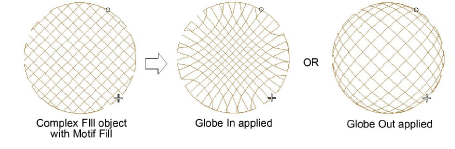
3Pulse Intro o haga clic en Aplicar. El efecto de Globo dentro o Fuera se aplica al objeto seleccionado.
3Para realizar más ajustes, haga clic en el icono Reformar objeto con el objeto seleccionado. Aparece un marco de guía con tres puntos de control.
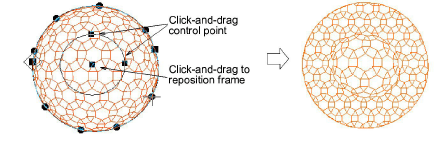
3Ponga los tres puntos de control en:
3Cambiar altura del marco
3Cambiar anchura del marco
3Reposicionar el marco.
3Puede generar capas de motivos coloreados duplicando un objeto y seleccionando un color diferente. Por ejemplo, después de rellenar una forma con círculos, puede crear una segunda capa, compensarla y aplicar un color diferente. Después puede aplicar efectos tales como Globo fuera a todo el Relleno de motivos.
Productos
Complementos de EmbroideryStudio
Soluciones
Aprendiendo
|
Copyright ©2025 Wilcom Pty Ltd | Condiciones de uso | Política de privacidad |

