Click Mode > Home to return to the Home
screen to get started with a new design, or access tutorials and
other product information.
Use
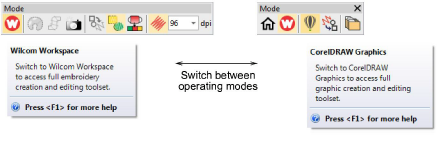
Mode > Wilcom Workspace to
digitize and edit embroidery designs. Display embroidery as well
as artwork. View designs realistically in 3D simulation.
Use
Mode > CorelDRAW Graphics to
import, edit or create vector artwork as a backdrop for embroidery
digitizing, manual or automatic.
Click Mode > Design Library to
open a window from which to search and manage designs and job
orders.
Open EmbroideryStudio using
the desktop icon or the MS Windows® Start menu. The application has one workspace
or ‘design window’ but you interact with it in different operating modes.
These can be accessed via the Modes toolbar.
The main modes you’ll be accessing are:
Mode
Function
Home
With
this mode you can return to the Home screen to access new designs,
or access tutorials and other product information.
Wilcom Workspace
This
mode allows you to create and edit embroidery objects using an
embroidery digitizing toolset.
CorelDRAW Graphics
This
mode allows you to create and edit vector objects using the CorelDRAW® Graphics Suite
toolset.
Design Library
This
mode allows you to manage designs and job orders.
Caution: You
need to calibrate your monitor so that designs at 1:1 scale appear at
real size. Do this when you first install EmbroideryStudio or
whenever you change your monitor. See
Calibrating the monitor for details.
Display embroidery
Use
Mode >
Show Embroidery to show and hide embroidery objects in CorelDRAW
Graphics.
Use
Mode >
Virtual Decoration Quality to set the rendering quality of embroidery
TrueView for a virtual decoration.
Artwork can be inserted, pasted or scanned
into EmbroideryStudio for
use as digitizing templates or ‘backdrops’.
You can show or hide backdrops temporarily while you digitize. You can
show or hide artwork temporarily in Wilcom Workspace. Conversely,
in CorelDRAW Graphics,
you have the option of turning on or off the embroidery display.