The EmbroideryStudio Reference Manual provides procedures for using the full range of sequin digitizing tools in EmbroideryStudio. However, there are a number of things to be aware of when digitizing sequins for Schiffli work. Typically, you will use the Sequin Run input method to create a string of sequins along a digitized line. You have the option of digitizing individual sequin drops with the manual method, or letting the system automatically generate drops according to current settings. Fixing stitches are generated automatically according to current settings.
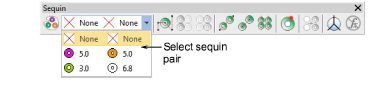
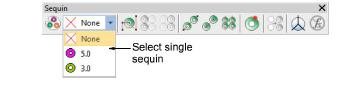
Select the sequin type you want to use from the Sequin Palette.
If you have selected a twin-sequin-capable machine, sequin shapes and sizes are displayed in pairs.
Otherwise you have access to single sequins only.
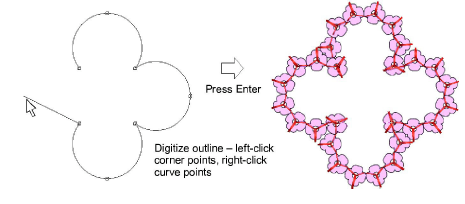
Use the Sequin Run Auto tool to digitize sequin runs by entering reference points – left-click for corner points, right-click for curve points.
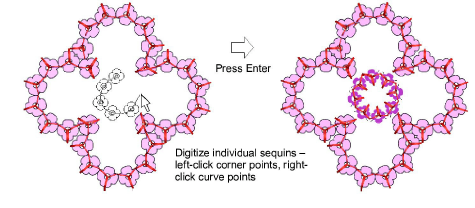
To add details or create special spacings, use the Sequin Run Manual tool to digitize specific sequin drops – again, left-click for corner points, right-click for curve points.
Use the Manual Sequin tool to digitize individual sequin drops with manual fixing stitches:
Right-click to drop a sequin.
Left-click to digitize fixing stitches around the sequin to secure it.

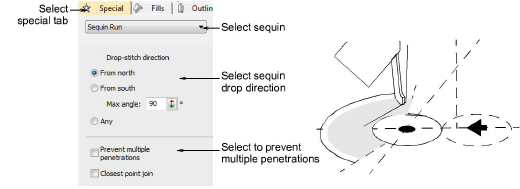
To check sequin drop direction, select Special > Sequin in Object Properties.
In multihead machines, sequins are fed from the front or ‘south’ which means that the initial fixing stitch should be placed on the ‘north’ side. In Schiffli machines, the opposite is the case. The Drop Stitch Direction in the Schiffli template is set to From South by default. See EmbroideryStudio Reference Manual for more details.
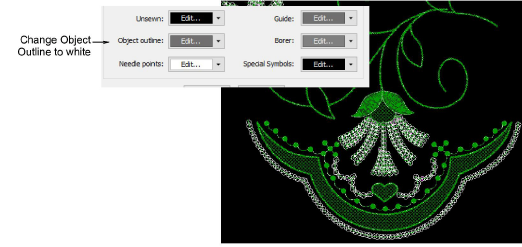
Tip: Because Schiffli work is usually done on a black screen, you may need to change Object Outlines in the Display Options to dialog to white in order to view sequins clearly in normal view.
|
Copyright ©2024 Wilcom Pty Ltd | Terms of Use | Privacy Policy |


