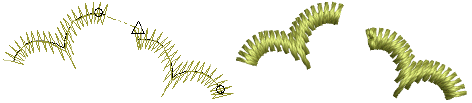
You can use automatic jumps as connectors between embroidery objects. Jumps move the frame from one part of the design to another without needle penetrations. You generally need to tie-off and trim the connecting thread.
1Click the Object Properties icon and select the Connectors tab.
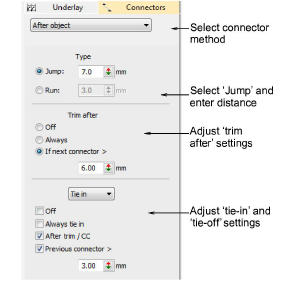
2Select a connector method:
|
Option |
Function |
|
After object |
Adjust connectors immediately following the current object. |
|
Inside object |
Adjust connectors joining components of lettering objects or motif runs. This setting also applies to disconnected parts of branched objects. It does not apply to segments within an object. |
3Select Jump and enter a distance for each frame movement. Shorter jump values generally improve stitch quality and reduce wear on the machine but may increase stitch-out time.
4Adjust trims and ties as required:
|
Option |
Function |
|
Trim after |
You can choose to turn off automatic trimming, to always trim connecting stitches, or to trim only when the connecting stitch is longer than a specified value. |
|
Tie in |
Tie-in stitches are inserted at the start of objects to prevent stitches from unraveling. You generally use them when the previous connector is trimmed. |
|
Tie off |
With trims, stitches need to be tied off so the thread can be trimmed without unraveling. Select between automatic tie-off methods to set preferred default. |
Tip: You can also digitize jumps manually using the Penetrations function.
|
Copyright ©2024 Wilcom Pty Ltd | Terms of Use | Privacy Policy |

