|
|
Use Standard > Options to access application options for kiosk and other settings. |
Like the kiosk Design folder, the default kiosk banner is located within the EmbroideryStudio folder structure. If you want to modify the banner in any way – e.g. with a specific location name – it is a simple matter to access the banner and update it. Alternatively, you can copy the modified banner to a separate location on your kiosk hard disk or network location and reference it there. If you have more than one kiosk set up, they can all reference the same banner.
1Navigate to the ‘Kiosk’ folder of your Wilcom EmbroideryStudio Digital Edition installation:
C:\Program Files\Wilcom\EmbroideryStudio Digital Edition\26\Kiosk\
Here you will find the default kiosk banner – dimensions 1200 x 100 pixels.

2Customize the banner as required:
Either replace the current image with one of the same dimensions.
Edit the current banner in any graphics or paint program and save to the same location.
Copy the banner to the same or another location and edit as desired.
If you move the banner to another location, you need to update the software settings as follows:
3Click the Options icon or select Setup > Options. Click the Kiosk tab.
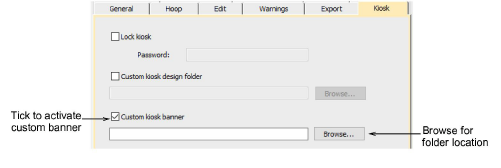
4Tick the Custom kiosk banner option and browse to the folder on your local drive or network.
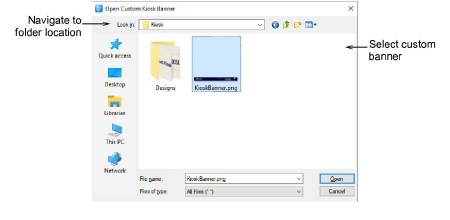
5Select the custom banner file and click Open. This then becomes the default banner which the kiosk will reference.
|
Copyright ©2024 Wilcom Pty Ltd | Terms of Use | Privacy Policy |
