You create templates from designs containing the required objects and property settings. Simply save the design, or elements of it, as a template. Templates look the same as design files, but use the file extension EMT.
1Start a new design or open an existing one.
2Adjust the property settings, styles, and effects as required.
3Add the objects and lettering to be included in the template. For instance, you may want to include sample lettering using different baselines. Simply overtype the sample text when using the template.
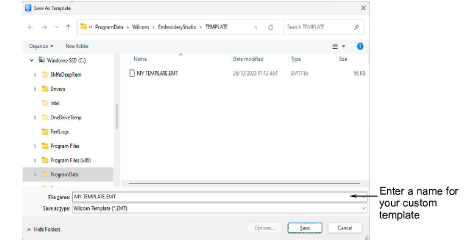
4Select File > Save As Template. The Save As Template dialog opens onto the Template folder.
Note: The dialog opens to this folder...
C:\ProgramData\Wilcom\EmbroideryStudio\TEMPLATE
Design templates must be saved here or they will not appear in the template list when you start a new design.
5Select Wilcom Template (EMT) from Save as type list.
6Enter a name and click Save. The template is ready for use.
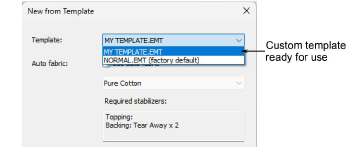
Tip: The File menu provides separate commands for saving monogram and team name templates. See related topics.
|
Copyright ©2024 Wilcom Pty Ltd | Terms of Use | Privacy Policy |