Coil stitching is more similar to Satin and is suitable for use with most closed-object input methods. Stitches are generated in spirals.
Coil fill is suited to narrow shapes or columns where each stitch traverses the width of the column. It provides a convenient way to fill an area with open stitching. Stitches are generated along curved lines and coils generate consistent stitch length even over different widths. This produces a smooth finish which does not unravel easily. Coil is generally applied to objects created with Column A, Column B and Column C.
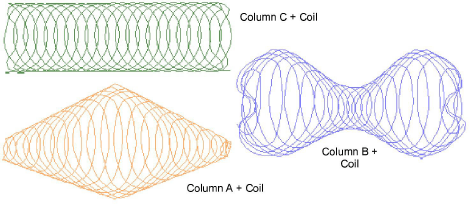
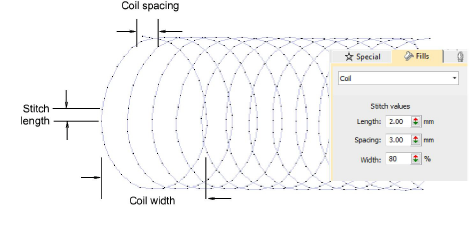
You can adjust Coil settings for stitch length, coil spacing and width.
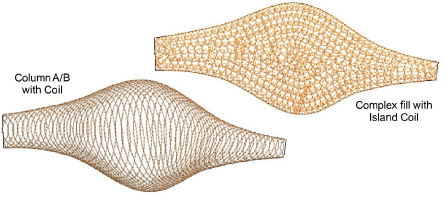
Column A/B objects can be used with variable width Coil stitching, while complex fill objects will default to Island Coil.
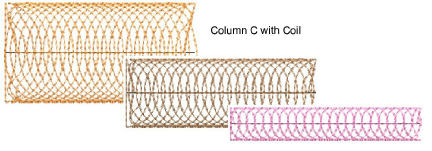
Similarly, Column C objects can be used with variable width stitching.
|
|
Use Fill Stitch Types > Island Coil to fill large objects with concentric rows of coil stitching, simulating the circular motion of hand-chenille embroidery. Right-click to adjust settings. |
Island Coil is used to fill larger closed areas. This technique allows complex shapes to be filled with concentric rows of coil stitching, simulating the circular motion of hand-chenille embroidery. With chenille, this is commonly used with looped Moss stitching. Stitch angles have no effect on this stitch type.
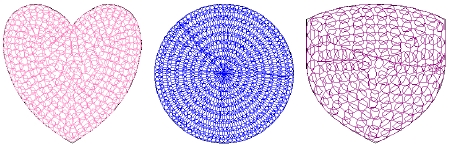
You can adjust a variety of Island Coil settings, including – stitch length, coil width, coil spacing, coil height and coil overlap.

Juggle spacing and width values for a more or less dense chenille look. Width is set as a percentage of coil spacing value. The smaller the value, the tighter the coils.
Adjust coil height as preferred. In chenille work, this value affects loop size.
Adjust coil overlap as preferred. This controls loop spacing and thus fill density.