|
|
Use Fill Stitch Types > Motif Fill to create decorative fills using embroidery motifs to form repeating patterns. Right-click for settings. |
|
|
Use Fill Stitch Types > Motif Fill to create decorative fills using embroidery motifs to form repeating patterns. Right-click for settings. |
You can adjust motif fills both interactively on screen and via object properties.
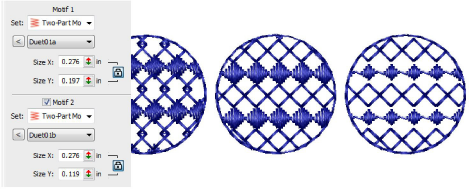
You can set the exact size of motifs in a fill. You can also scale Motif 1 and Motif 2 motifs independently. Adjust Size controls in the Object Properties > Fills > Motif Fill dialog.

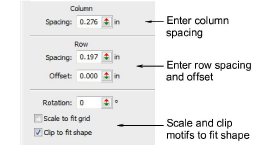
You can adjust the exact row, column and spacing settings for motif fills. The default settings define a simple grid where the spacing equals the motif dimensions. The row offset is set to 0.00 mm so columns and rows are perpendicular.

To adjust spacing and offset settings, open the Object Properties > Fills > Motif Fill dialog.

Adjust column and row spacing as well as row offsets.

Select the Scale to fit grid checkbox to scale motifs to exactly fit the grid squares.
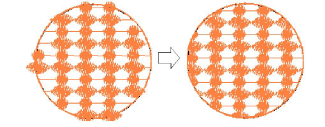
Select the Clip to fit shape checkbox to clip motifs that do not fit the shape.

The rotation angle defines the orientation of the entire motif fill pattern. It overrides the stitch angle you set when digitizing the shape with Complex Fill. Enter a rotation angle in the Object Properties docker.
