The Create Motif function lets you save your own motifs for future use. Custom motifs are saved in custom ‘motif sets’.
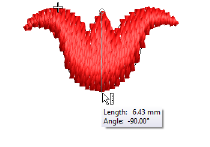
1Create or choose the object you want to save as a motif. This may be an outline or a filled object.
2Adjust stitch angles as required, and turn off any underlays.
3Scale to a suitable nominal size for practical use – e.g. 5-10 mm. Bear in mind that motif size can be adjusted within the run or fill.
4Duplicate and align the motif as you want it to appear in a motif run. Use Alignment tools for precise arrangement.
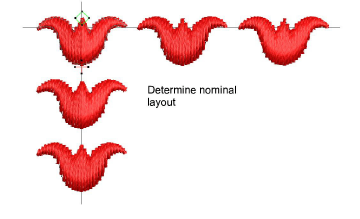
5Once you have determined the layout, select objects and apply Closest Join. Use the middle motif to determine reference points.
6Select the motif and choose Object > Create Motif.
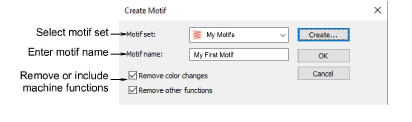
7Select a custom motif set from the droplist and enter a name in the Motif Name field.
Optionally, click Create. The Create Motif Set dialog opens.
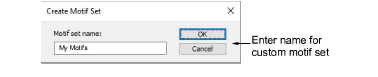
Enter a name for the new motif set and click OK. The Motif Set is ready for use. Motif sets are stored in the program folder ...\Userletw.
8Choose how to handle any included machine functions:
If you have created a multi-color motif, untick the Remove color changes option. This ensures that color changes are preserved.
If you have created a motif with explicit trims, untick the Remove other functions option. This ensures that trims are preserved.
9Click OK.
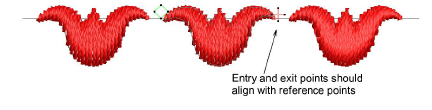
10Click two reference points for the motif. These should coincide with entry and exit points.
Reference points determine default motif orientation. They also determine default spacing between motifs.
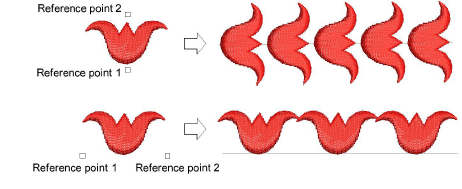
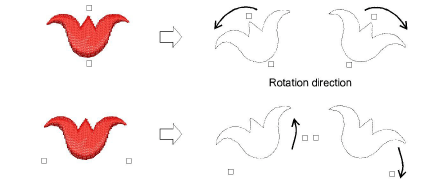
With individual motifs, reference point 1 becomes the anchor point. Reference point 2 becomes the rotation point.
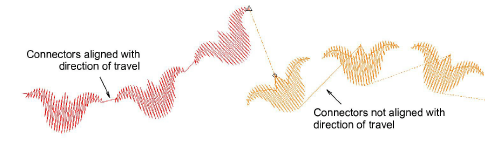
11Click OK. The motif is ready for use. Check to make sure connectors align with the direction of travel.
|
Copyright ©2024 Wilcom Pty Ltd | Terms of Use | Privacy Policy |